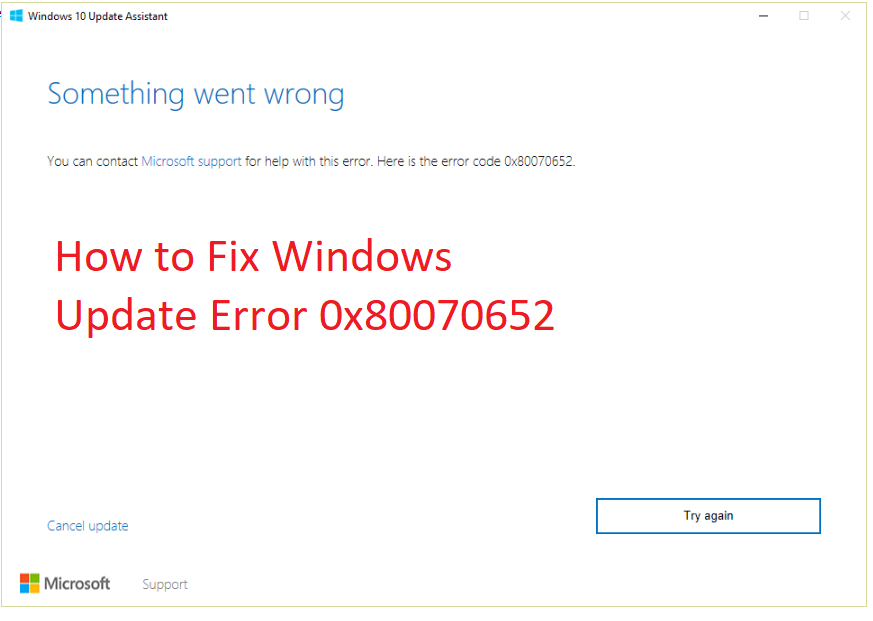
Are you trying to update your windows and getting the error 0x80070652?
Windows update is common among computers running the Windows operating system. Windows requires downloading and installing necessary security updates or other feature upgrades.
However, this can sometimes lead to Windows update failing and reporting error 0x80070652. You can panic at first when you experience this error, but you don’t need to.
As you can easily fix this error. You need to be patient and follow this guideline to the end. I will provide you full details of how to fix error 0x80070652.
What Does Error 0x80070652 Mean?
Error 0x80070652 means that a certain file or folder is already installed in the system, and Windows Update can’t install a duplicate of it.
It often occurs when Windows Update tries to install the same Update previously installed. You can uninstall the already installed Update.

How to Fix Windows Update Error 0x80070652
Below are the best solutions to try. Don’t try them all at once. Instead, try them one by one and in that order.
You don’t require to continue with the rest when you get the one that works for you. So let’s dive in.
1. Run the Troubleshooter for Windows Update
This is the first solution to try. It will scan the system for any problems related to Windows Update installations and fix them if possible.
To do this on Windows 10, these are simple instructions:
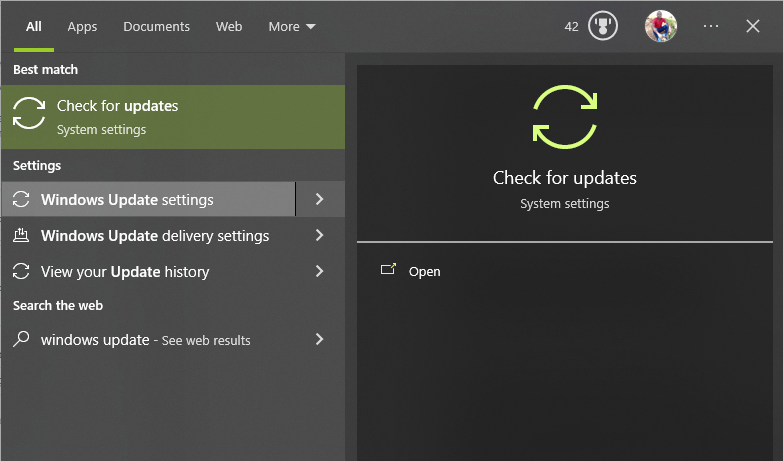
1. On your Windows search box, type in “Windows Update.”
2. Click on Windows Update settings
3. You will see a dashboard with different options. Click on Troubleshoot. It is on your left panel. Then click on Additional Troubleshooter

4. Locate and click Windows update and Run the troubleshooter

5. An online screen instruction will be displayed. Follow the instruction on the screen. Wait for the troubleshooter to finish
6. Reboot your System
Try to install the updates again, and if this doesn’t work, proceed to the next solution.
On Windows 8:
1. Type Network problems. Click on Identity and Repair network problems

2. A Windows network diagnostics will open

3. Wait for the network problems to be detected and fixed.
4. Reboot your system
5. Try to install the updates again
Read More: How to Fix Error Code: Result_Code_Hung
2. Run System File Checker Scan
At times, your computer may have some corrupted system files, which can cause this error. They hinder the installation of updates.
If you get the Windows update error 0x80070652, running the System File Checker (SFC) will help you repair these corrupted files.
SFC is a built-in tool that checks for corrupted system files and replaces them. To do this:
1. On your search bar, type ‘cmd‘ and press Ctrl + Shift + Enter. Or you can select “Run as Administrator”

2. The cmd will open with administrative privileges.
3. Type ‘sfc/scan’ now and press enter.

4. The SFC will now scan your system for corrupted files, and if any are found, they will be replaced by cached copies from the component store.
5. Once the scan is complete, restart your computer and check if you can install updates without errors.
3. Update Device Drivers
The outdated or missing device drivers can also lead to error 0x80070652. Keeping the device drivers updated is essential for the smooth functioning of your system.
Drivers are pieces of software that help Windows interact with hardware and other programs.
When outdated, they may be incompatible with your PC, leading to the error 0x80070652.
They can also make your computer have other errors and slow the system’s performance. Follow these steps to update the drivers:
1. Open Device Manager on your PC.
You can open the Device Manager using these three methods:
– On your Windows search toolbar in the left bottom corner of your screen, type in “Device Manager.” and different options will appear

– Alternatively, press the Windows + X keys.
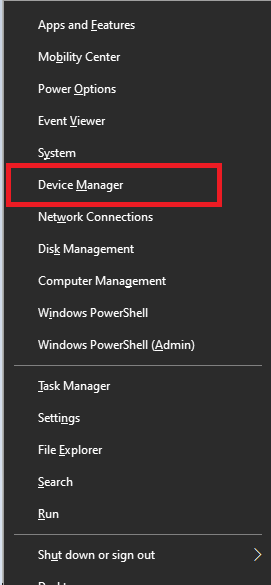
– Locate the computer Icon. Right-click and click the Manage option.

2. These options will provide you with a list of all hardware devices available on your computer.
3. Click or double-click on Device Manager
4. Click on any hardware device in the Device Manager window and right-click it.
5. select the “Update Driver” option from the context menu that appears.

6. Follow the instructions and finish the installation process.
7. Repeat step 4 to 6 for all the devices on your PC.
8. Restart your computer when done, and check if the error 0x80070652 is resolved.
You can also right-click the Computer icon and select the “Properties” option. From the general tab, click on “Device Installation Settings.”
Select “No (device might not be working as expected).” Save the changes. This will disable Windows’s automatic driver update feature and solve the error 0x80070652.
Using Driver Easy
If you want to locate and update the drivers at once, you can download Driver Easy. It is a driver update tool that detects and updates the missing & outdated drivers on your computer.
You can scan for any hardware-related problems. It is simple to utilize and can save you a great deal of time. How to use the software:
1. Download and install Driver Easy.
2. Run Driver Easy by clicking on it. Click on the Scan Now button. This will scan your PC for any driver-related issues.
3. On each device, click the update button. This will install the correct version of its driver.
4. click the Update All button to download the drivers automatically. This will install the accurate versions of all missing or out-of-date drivers on your PC.
4. Clean Boot
A clean boot helps you identify any third-party programs causing the error 0x80070652.
It starts your computer with a minimal set of drivers and programs so that you can determine which program is causing the error.
To perform a clean boot:
1. Press Windows + R.
2. Type “msconfig” and press enter.
3. General tab and select Selective Startup. After that, uncheck the Load startup items option.

4. Head to the Services tab and check the Hide all Microsoft services option.

5. Click on Disable All button and select OK.
6. Restart the computer. Check if the error 0x80070652 is resolved.
After troubleshooting, you can undo the changes you made by running System Configuration and selecting Normal Startup after step 3. This will restore all services to their original state.
4. Reset the Software Distribution folder
According to research, it is optional to modify the contents of the Software Distribution folder.
However, you can try resetting this folder if all other methods fail to resolve the error 0x80070652. These are the steps:
1. Open Command Prompt with administrative privileges.

2. Type “net stop wuauserv.”
3. Type “net stop bits”
4. Type “net stop bits”
5. Type “net stop msiserver”
6. Now, you will need to rename the Software Distribution folder.
Type “ren C:\Windows\SoftwareDistribution SoftwareDistribution.old” and press enter.
Type “ren C:\Windows\System32\catroot2 Catroot2.old” and press enter.
7. Now you are done, but you will need to open and restart the BITS, MSI Installer, and Windows Update services.
Type “net start wuauserv”
Followed by: “net start cryptSvc“
Type “net start bits” and
Type “net start msiserver”
8. After restarting the services, check if the error 0x80070652 is resolved. Try to rerun Windows Update.
5. Manually Install the Update
If you still encounter error 0x80070652, you can try manually installing the Update.
This method involves downloading the Update directly from Microsoft and installing it using a command line. You will require to follow the steps:
1. Head to Microsoft Update Catalog
2. Search for the Update you want to install and click Download.
3. Now, open cmd with admin privileges by right-clicking.
4. Type “expand -f:* <name of the downloaded file>.msu c:\<name of the folder>” and press enter.
5. Type “cd <name of the folder>” and press enter.
6. Type “start /wait <name of the update>.exe” and press enter.
7. Follow the instructions and wait for the installation to finish.
Check if you still get the error 0x80070652 after restarting the computer. If not, then the Update has been successfully installed.
6. Using Use a System Restore Point
If the error 0x80070652 persists, you can use System Restore to undo the changes you made to your computer. It restores your computer to the previous state.
To use System Restore, follow the steps given below:
1. Open the Start menu and type “Create a Restore point ” in the search bar.

2. Click on the first results
3. Click on System Protection on the pane.
4. Select the System Restore option.
5. Click on Next button and select a restore point from the list of available points.
6. Follow the on-screen instructions to complete the process.
7. Restart your computer for the changes to take effect.
8. Check if the error is fixed.
Remember to clearly create a System Restore Point before making any changes, which will help you if something goes wrong. To create a restore point:
1. Open System Properties by typing it on the Windows search bar. Go to the System Protection tab
2. Click on Create, then provide a name and click on Create
3. Finally, click OK, and your restore point will be created.
The above is a range of methods to fix error 0x80070652. If all else fails, you can contact Microsoft’s support and ask for help.
Read More: How to Fix Windows Update Error 0x80070003
Conclusion
You can fix the error 0x80070652 quickly and easily by using Windows Update Troubleshooter, resetting Windows Updates Components, or performing a clean boot.
Follow each method and ensure you restart your computer. If you still cannot fix the error 0x80070652, contact Microsoft support for further assistance.