Nowadays, wireless-supported devices are getting more and more popular, like Apple. This company is known for its forward-thinking and sleek designs. The new AirPods are no different, but how can you use them with other devices that are not Apple products? This article will show how to connect AirPods to Dell laptop step by step.

Can You Connect AirPods To A Dell Laptop?
Yes, you can connect AirPods to a Dell laptop. You will need to use the Bluetooth settings on your laptop to connect the two devices. Once they are connected, you can use the AirPods to listen to music, make phone calls, and more.
You will be to listen to music stored on your computer or stream it from online services such as Spotify. Additionally, they can be used to make hands-free phone calls.
How to Pair AirPods to Dell Laptop?
Dell and AirPods have been working together to provide users with the best possible audio experience. AirPods are now available in Dell laptops and 2-in-1s.
Dell has been working to ensure that its products are compatible with AirPods and that users have the best possible experience using them. The following are instructions on how to pair them with Dell laptops:
1. Make Sure They Are Fully Charged
Before you start the process of connecting AirPods to a Dell laptop, make sure that they are fully charged. This will help to ensure that you have a seamless and uninterrupted experience. To charge your AirPods, follow this simple process;
i) Slide your pair of AirPod earbuds into the case
ii) Connect the case to a power source using the Lightning connector
iii) Once the LED indicator on the case lights up, your AirPods are charging
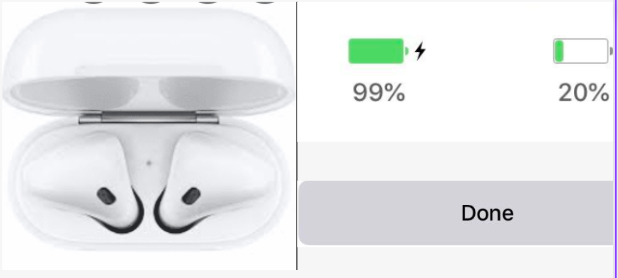
When they are fully charged, the LED indicator will turn off. This show that your AirPods are now ready to be used.
2. Enable Bluetooth on Your Dell Laptop
For your AirPods to connect to your Dell laptop, you will need to enable Bluetooth on the device. You can access the action centre by clicking the icon in the bottom right-hand corner of your screen and then selecting ‘Connect.’
Alternatively, you can go to Settings > Devices > Bluetooth & other devices or click on Windows + A. Right-click on the Bluetooth icon in your system tray and select ‘Open Settings.’ From here, you can enable Bluetooth by clicking the toggle switch next to Bluetooth.
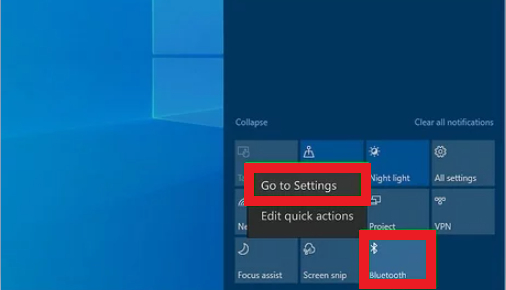
Once in Bluetooth settings, you must turn the feature On and ensure it is set to ‘visible.’ If you have other Bluetooth devices paired with your laptop, you may need to remove them before your AirPods connect. To unpair them, click on the device in the Bluetooth settings and select ‘Remove Device.’
3. Enable Pairing Mode on AirPods
Once you fully charge your AirPods and enable Bluetooth on your Dell laptop, you need to put your AirPods in pairing mode. You can do this by holding the setup button on the case for a few seconds until the LED indicator flashes white.
Alternatively, you can open the case lid, and the AirPods will automatically enter pairing mode.

You can also remove them from the case and put them in your ears, and they will automatically enter pairing mode. They will notify you when they are in pairing mode and appear on your laptop’s ‘Available devices’ list.
Why is One AirPod Louder than the Other?
4. Connect AirPods with Dell Laptop
On the Dell laptop screen, click on Add Bluetooth and other Devices. You will see a list of available devices. You can locate the (+) sign on the Bluetooth toggle. The range of the AirPods is about 33 feet.

Click on the (+) sign and Add New Device. The name of your AirPods will be displayed on the list. Click on your AirPods to connect them to your Dell laptop. If you are prompted for a passcode, enter 0000.
Now you can use your AirPods with your Dell laptop! You can adjust the volume on your AirPods or your Dell laptop. On your taskbar, click on the speaker icon and adjust the volume.
You will see the name of your AirPods next to the speaker icon. On the sound control panel, select Headphones and then click on Properties. You can now adjust the volume of your AirPods on the Levels tab.
Adjusting the Microphone Settings
You can use the built-in microphone on your AirPods to make Skype calls or record videos. You will need to change the settings if you want to use the microphone on your Dell laptop.
On your taskbar, click on the search box and type in Microphone. Select Microphone privacy settings from the list of results.
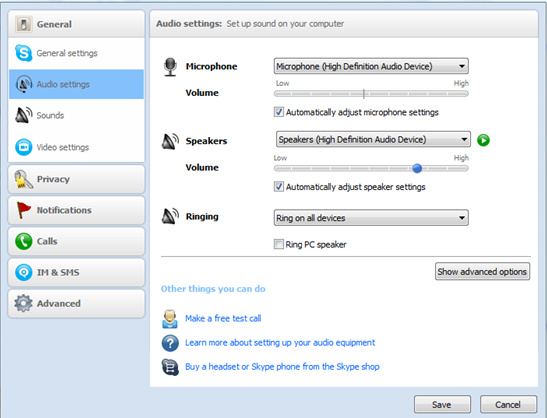
On the Microphone, privacy settings page, turn off the Microphone access for this device setting. This will allow the AirPods microphone to be used with your Dell laptop.
You can turn the setting back on when you are finished using the AirPods microphone.
If you want to use your AirPods with another device, you can easily switch the connection by holding the setup button on the case. The LED light will flash white, and you can then choose the new device you want to connect to. You can also use the Siri command “Hey Siri, connect to myAirPods” to switch the connection.
Read More: How to Fix My Dell Laptop Won’t Turn On
Disconnecting Your AirPods
If you want to disconnect your AirPods from your Dell laptop, navigate to the Bluetooth settings on your Dell and click on the icon “i” next to AirPods. Click on the “Forget This Device” button, and your AirPods will be disconnected.
You can hold the setup button on the case for about 15 seconds until the LED light flashes white thrice. This will reset your AirPods, and you can then reconnect them to your Dell laptop.

Conclusion
When you buy your AirPods, they come with a charging case and a Lightning cable. If you want to connect your AirPods to a Dell laptop, you must have a Bluetooth-enabled one.
The process is pretty simple and straightforward. You need to turn on the Bluetooth feature on your laptop and then put your AirPods into pairing mode.
Your laptop should be able to detect your AirPods, and you can connect to them easily. After that, you can start using your AirPods with your Dell laptop.